
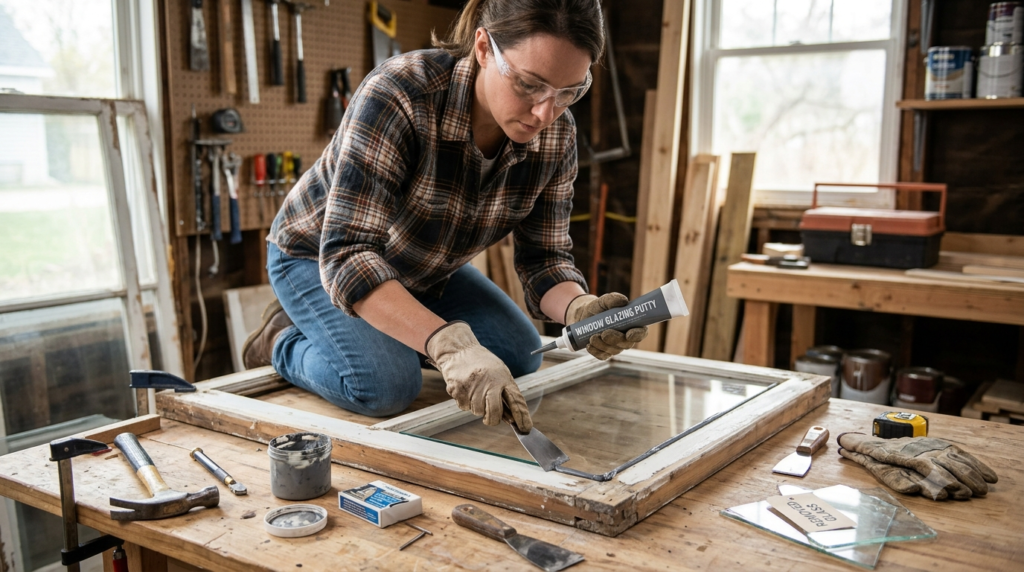
A cracked pane rarely picks a convenient moment. A stray ball, a storm-driven branch, or just decades of thermal stress, and suddenly you’re looking at a jagged hole where your view used to be. The first instinct for most homeowners is to search “window glass replacement near me” and brace for the invoice.
Here’s the good news: for a huge number of windows — especially standard wood or vinyl frames with a single pane — replacing the glass yourself is a completely manageable weekend project. This guide walks through the full process of replacing a glass window step by step, from safely clearing broken glass to laying down a proper putty seal, so you know exactly how to replace a window pane without paying emergency callout rates.
Why DIY Window Glass Replacement Makes Sense
Professional home window repair typically runs $150 to $400 per window, and that number climbs fast if you need an emergency broken window fix outside business hours. The materials themselves — glass, putty, and glazier’s points — are a small fraction of that cost.
Factor | Hiring a Professional | DIY Glass Replacement |
$150 – $400+ | $20 – $70 (materials only) | |
Turnaround Time | Days to weeks for scheduling | As soon as the glass is cut |
Labor Rate | $50 – $150 per hour | Your own time |
Skill Level Needed | Professional | Beginner to intermediate |
Best For | Custom shapes, large IGU failures | Standard wood/vinyl single panes |
If you’re comfortable with basic hand tools and a bit of patience, DIY replacement glass for a window is one of the most cost-effective home repairs you can tackle.
Single Pane vs. Double Pane: Know What You’re Working With
Before buying anything, figure out exactly what kind of window you have — it changes the whole approach.
Single pane windows are common in older homes, sheds, and garages. It’s just one sheet of glass held in a wood sash with glazier’s points and putty. This is the easiest scenario for replacing window glass and the main focus of this guide.
Double pane windows use an Insulated Glass Unit (IGU) — two panes fused together with a sealed layer of air or argon gas between them for insulation. If one layer cracks, or the seal fails and the glass fogs up, you can’t just swap out one side. Changing double pane window glass means replacing the entire IGU as a factory-sealed unit; you can order a custom-sized IGU and install it yourself, but cutting an insulated unit at home isn’t realistic.
A safety note: in large sliding doors, patio doors, and other hazardous locations, building codes generally require tempered glass window replacement, since tempered glass breaks into small, dull pieces instead of sharp shards. Check your local code before ordering.
Tools You’ll Need
Safety gear (don’t skip these):
- Leather gloves (canvas won’t stop sharp edges)
- Safety goggles
- Closed-toe boots
Removal and prep:
- Heat gun (for softening old, hardened putty)
- Stiff putty knife
- Pliers or needle-nose pliers (for pulling old glazier’s points)
- Wire brush and medium-grit sandpaper
Installation materials:
- Replacement glass cut to your exact measurements
- Glazier’s points (traditional triangle points or modern push-points)
- Window glazing putty (latex dries fast; oil-based takes weeks to cure but lasts longer)
- Linseed oil (optional, but recommended for bare wood)
Step 1: Clear the Broken Glass Safely
Any window pane repair starts with removing the hazard safely.
If the pane is cracked but still sitting in the frame, run strips of duct or packing tape across it in a grid pattern first — this keeps the pieces from scattering when you pull them loose. Lay a heavy drop cloth on both sides of the window (skip plastic sheeting; glass cuts right through it).
Put on your gloves and goggles, then work the shards loose by hand, pulling down and out rather than up. Drop them into a sturdy cardboard box, not a plastic bag, which glass will puncture.
If you’re not ready to install new glass right away, a temporary patch of heavy plastic sheeting or cut plywood, taped securely into the opening, will hold you over for an emergency broken window glass replacement.
Step 2: Clean Out the Old Frame
The channel that holds the glass (called the rabbet) needs to be completely clean for the new pane to sit flat.
Replacing glass in a wood frame window: Old putty tends to harden like concrete over the years. Run a heat gun about two inches from the surface, moving constantly so you don’t scorch the wood or crack neighboring panes. Once the putty softens, scrape it away with a stiff putty knife. Underneath you’ll find the old glazier’s points — pull these out with needle-nose pliers. Finish by brushing away dust and debris from the bare wood.
Tip: dry, bare wood pulls the oil straight out of fresh putty, which cracks the new seal within a year. A light coat of linseed oil or clear wood sealer on the rabbet before you re-glaze solves this.
Replacing glass in a vinyl window: Skip the heat gun entirely — it will melt the vinyl. Vinyl frames use snap-in glazing strips (stops) and foam tape instead of putty. Pry the stops out carefully with a thin putty knife, keeping track of which piece came from which side, then cut through the foam tape holding the old pane in place. Clean off any leftover adhesive with a solvent before moving on.
Step 3: Measure for the New Glass
Accurate measurements are the difference between a clean install and a wasted trip to the glass shop.
Measure the width and height of the opening from the inside of the channel on one side to the inside of the channel on the other — not the outer frame dimensions. Take the width at the top, middle, and bottom, and the height at left, center, and right, since older frames often aren’t perfectly square anymore. Use the smallest measurement in each direction.
The clearance rule: glass needs a little breathing room to expand and contract with temperature. Subtract 1/8 inch (about 3mm) from both your final width and height — that gives roughly 1/16 inch of clearance per side, enough for expansion without leaving a gap too wide for the putty to cover.
Bring these final numbers to the glass shop. If you’re replacing an insulated unit, you’ll also need to confirm the exact thickness of the current IGU.
Step 4: Dry Fit and Bed the Glass
Before permanent installation, confirm your new glass fits. Set it into the opening without forcing it — it should drop in with that slight wiggle room all around. If it binds anywhere, either shave the frame down slightly or have a fraction trimmed off the glass.
Once it fits, set it aside and prepare the “bed” — the layer that seals and cushions the glass against the frame. Knead a small amount of glazing putty in your gloved hands until it’s soft and pliable, then roll it into a thin rope, about 1/8 inch thick. Press this rope around the entire channel where the glass will sit.
Lift the glass back in and press it firmly against the putty bed, working around the perimeter rather than the center, until a small amount of putty squeezes out the back. This bedding layer is what actually keeps rain and drafts out — it’s a critical part of any lasting glazing window repair.
Step 5: Lock the Pane in With Glazier’s Points
One thing that trips up a lot of first-timers: putty doesn’t hold the glass in place — it seals it. The actual structural job of pinning the glass to the frame belongs to the glazier’s points.
With the glass seated in its putty bed, place a point flat against the glass, rest your putty knife against its raised edge, and rock the knife gently back and forth to drive the point into the wood. Space points every 4 to 6 inches around all four sides, and press them flush with the surface so they don’t show through the final putty layer.
Important: never tap the putty knife with a hammer or mallet — the vibration can crack a brand-new pane instantly. Steady hand pressure is all it takes.
Step 6: Apply the Finish Putty
This is the step that determines how the finished window looks, so take your time — it’s normal for the first side to come out rough before you get the rhythm.
Knead another handful of putty until it’s workable, roll it into a rope about the thickness of a pencil, and press it into the channel to fully cover the glazier’s points. Then, holding your putty knife at roughly a 45-degree angle (dipping the blade in water or a bit of linseed oil to keep it from dragging), draw it along each side in one smooth, continuous pass to form a clean, angled bead. Done correctly, none of the putty should be visible from inside the house.
Likely Cause | Fix | |
Putty tears or pulls | Dry knife, moving too fast | Lubricate the blade, slow down |
Lumpy or uneven finish | Too many short strokes | Use one long sweeping pass per side |
Putty visible from inside | Knife angle too shallow | Increase the angle to trim more compound |
Once all four sides are smooth, use a scrap of putty to dab away any oily residue on the glass — don’t wipe it with a rag yet, or you risk denting the fresh seal.
Step 7: Let It Cure, Then Paint
The job isn’t finished until the putty cures and gets painted.
Latex glazing compound is typically paintable within 3–4 days. Traditional oil-based putty needs 2–4 weeks to skin over — press a fingernail lightly into the surface; if it leaves an indent, give it another week.
Once cured, prime and paint with an exterior-grade product. For a truly watertight seal, let the paint slightly overlap onto the glass — about 1/16 inch past the putty line — rather than stopping right at the edge. That small overlap is what actually keeps water from creeping under the compound. Once dry, a razor scraper cleans up any excess paint on the glass itself.
Special Situations Worth Knowing About
Window sash glass replacement: For double-hung windows that slide up and down, don’t try to work with the sash still hanging in the frame. Remove it completely — pop the side stops, detach the sash cords or weights, and bring the whole sash to a workbench. Working flat gives you far more control with the putty knife.
Emergency broken window glass replacement: If a pane shatters overnight or during severe weather and there’s no time to wait for cured putty, focus on securing the opening fast. Clear the jagged glass, then cut a sheet of thick plexiglass or acrylic to size using a heavy-duty utility knife, and secure it with weatherproof tape or temporary plastic clips. It isn’t a permanent fix, but it protects the interior until a proper pane can be installed.
Frequently Asked Questions
How do you replace glass in a double-pane window?
You don’t replace just one layer — order a full replacement IGU built to your exact opening dimensions. Once it arrives, remove the vinyl stops, cut through the old adhesive tape, pull the failed unit out, and set the new IGU in place with fresh double-sided glazing tape.
What does it typically cost to replace window glass?
A professional callout for glass pane replacement usually runs $150–$400. Doing it yourself, a custom-cut piece of single-strength glass generally costs $15–$40, plus roughly $20 for putty and glazier’s points.
Can I just replace the glass instead of the whole window?
In most cases, yes. If the sash — wood or vinyl — is still solid and free of rot, there’s no reason to replace the entire window unit. Swapping the broken pane is the more economical route.
What’s the difference between window repair and window glass replacement?
Window repair is the broader category — sash cords, stuck frames, rotted sills, broken locks. Window glass replacement specifically refers to removing a cracked or fogged pane and installing a new one.
How do I secure a broken window overnight?
Wear thick gloves and clear away loose shards first. Fold a heavy plastic sheet or thick trash bag so it’s doubled over, then tape it firmly to the window frame (not the wall) with high-adhesion tape, sealing the edges tightly until you can replace the glass properly.
Is replacing tempered glass harder than regular glass?
Yes, in one key way: tempered glass can’t be cut after manufacturing. It has to be ordered to the exact finished size, since tempering happens as the final step at the factory — so your measurements need to be exact before you order.
Final Thoughts
A shattered window is unsettling, but it doesn’t have to be an expensive emergency. Once you understand how to replace a window pane properly — clearing debris safely, measuring precisely, prepping the frame, bedding the glass, pinning it with points, and sealing it with a clean putty line — the process is well within reach for most homeowners.
Whether it’s a simple single-pane window replacement on a garage window or a more involved glazing repair on an older wood-frame home, the fundamentals stay the same. And if you’d rather get a clear picture of costs before you start — materials, glass cutting, or a professional install, Digital Estimating can help you put together an accurate estimate so there are no surprises either way.